The OT will automatically initiate a UCAC4 guide star query and select the brightest allowed guide star(s) in the current wavefront sensor (WFS) patrol field. The allowed WFS patrol field is the union of the patrol fields for all offset positions where the WFS is set to guide (not freeze or park). This field is shown by the green line in the Position Editor. The magnitude limits for the guide star candidates are determined by the WFS and the observing conditions constraints, and are shown in the bottom right of the Target Component when a guide star is selected. Any changes to the observation will cause the guide star selection to be re-run.
All automatically-selected guide stars are stored in the "Auto" guide star group in the target list of the Target Component. The "Auto" group will be empty if no guide star is found and for daytime calibrations that do not require a guide star. In some cases, especially older programs for which no guide stars were defined, the Auto group may be disabled. If the "Auto" group is greyed out or labeled "Auto (disabled)", then double-clicking on the "Auto" label in the target table should activate it.
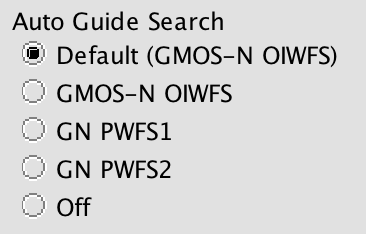
The type of WFS/guide star that the auto-selection mode will pick is shown in the Auto Guide Search box (Target Component) and list (Position Editor). The options are based on the instrument and configuration and will update automatically. For example, adding an Altair component to a NIRI observation will cause the Altair guide star option to appear and the incompatible PWFS options will disappear. The "Default" guide star search is the recommended option for the instrument and configuration of the observation. This can be overridden by selecting a different Auto Guide Search option in either the Target Component or the Position Editor.
|
Target Component |
Position Editor |
In some cases the automatic guide star search will not find a guide star. Guide star selection is not attempted for daytime calibration observations. For non-daycal observations the lack of a guide star means that there is no sufficiently bright UCAC4 guide star in the selected guider's field-of-view. The following are the main options for getting the automated guide star service to find a guide star:
- Check that the conditions constraints are set correctly. This should be the case for observations created from templates, but observations created from the Observation menu in the Science Program Elements toolbar will have default conditions of Any/Any/Any/Any and the corresponding magnitude limits will be too bright.
- For longslit spectroscopy with GMOS or FLAMINGOS-2, set the Position Angle mode to "Allow 180deg flip" or "Average parallactic" (which also allows a 180 degree flip) as appropriate.
- Display an image of the field in the Position Editor and look for obvious bright stars just outside the effective WFS patrol field outlined in green. Change the position angle, shift the field, or change the offset pattern, if possible, until a guide star is selected.
The Auto group cannot be deleted or edited. However, the automatically-selected guide star can be deleted either with the red delete button ( ) in the Target Component or by selecting the "Off" option in the Auto Guide Search menu (Target Component or Position Editor). If this is done and no manually-selected guide stars are activated, then no guiding will be done.
If the automatic selection system does not find a guide star, or you prefer to override the selection, then you can select a guide star manually by clicking on one of the add guide star buttons in the Position Editor and then selecting a star's marker on the image. The "Manual GS" button in either the Target Component or the Position Editor will bring up the Catalog Query Tool or the GeMS Guide Star Search tool that will allow manual queries of the UCAC4 or PPMXL catalogs. All manually-selected guide stars are added to a Manual guide star group in the Target Component. Any guide star or group can be activated by double-clicking on the row in the target table for the guide star or group or by highlighting a row and clcking the set/unset group button (![]() ).
).

